You’ve felt it before: that slight frustration as you wait for the oven’s preheat beep, your prepared dinner sitting idle on the counter, or the sudden scramble when a pan you thought was ready starts smoking the moment your food hits it. These small moments of kitchen friction aren’t just about timing—they’re signs of wasted energy and missed opportunity. Mastering the flow of heat in your kitchen is one of the simplest, most impactful skills a home cook can learn. It’s not about fancy equipment, but about a smarter protocol. This article breaks down that protocol into a clear, actionable preheat and residual heat checklist. We’ll move beyond the basic “turn it on and wait” approach to a three-part system that saves power, reduces ambient kitchen heat, and delivers more consistent, better-textured results every time you cook.
Mastering your preheat and residual heat routine means learning to time your appliance’s warm-up, recognize the right moment to start cooking, and confidently turn off the heat early to let food finish cooking with stored energy. This simple protocol saves power, reduces kitchen heat, and leads to more consistent results. Think of it as a strategic energy-saving cooking routine where you actively manage heat flow, not just temperature settings.
The Core Protocol: A Three-Part Heat Management System
Think of heat in your kitchen not as a simple on/off switch, but as a flow of energy you can direct. Mastering this flow is the key to an energy saving cooking routine. The most efficient cooks follow a simple, three-phase mental model that works for any appliance.
Phase 1: The Strategic Preheat. This isn’t just waiting for a beep. It’s about getting your pan, oven, or pot to the precise level of “hot enough” for your task, avoiding the energy waste of an empty, maxed-out appliance.
Phase 2: The Active Cook Window. This is the period where you apply direct, active heat to do the heavy lifting—searing, boiling, or rapid cooking. Your goal here is to be efficient and prepared for the next step.
Phase 3: The Residual Heat Finish. This is where you save the most energy and often get the best texture. You intentionally turn off the heat source and let the stored thermal energy in your appliance or cookware gently finish the cooking process. This is the essence of smart residual heat cooking tips.
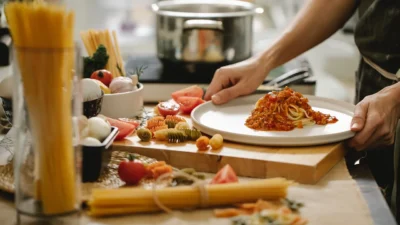
Photo by Meruyert Gonullu on Pexels
Phase 1: Your Strategic Preheat Checklist
Forget “set it and forget it.” Use this appliance-specific guide to preheat smarter, not longer. The goal is to recognize visual and tactile cues that signal “ready,” which often comes before the official preheat cycle ends.
For Your Oven
- Time it with prep: Start preheating only when you’re 5-10 minutes from being ready to cook, not 30 minutes before.
- Watch the light, not just the beep: Many ovens have a heating element light that turns off when the target temp is reached, which can happen before the “preheat complete” alert. This is your cue.
- Position matters: For most even cooking, place your rack in the center position before you start the preheat.
- Skip the empty preheat for broiling: For a quick broil, you often don’t need a full preheat. Just turn on the broiler and give it 2-3 minutes to get hot.
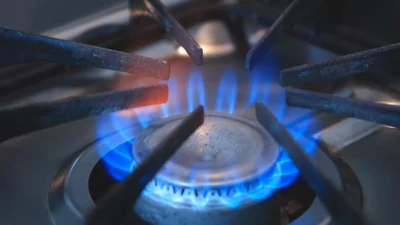
For Your Stovetop & Pans
- The Water Bead Test: Sprinkle a few drops of water on a dry pan over medium heat. When the droplets skitter and bead up like mercury, the pan is perfectly preheated for most tasks. If they instantly vaporize, it’s too hot.
- Watch the Oil: Add a thin layer of oil once the pan is dry-hot. It should shimmer and flow easily within a few seconds. If it smokes immediately, the pan is too hot.
- Match heat to the task: Use high heat only for bringing large pots of water to a boil. For 90% of sautéing and searing, medium-high is your “default high.” This is a cornerstone of energy-efficient preheating.
- Respect your cookware: Cast iron and carbon steel take longer to heat up but hold heat incredibly well. Preheat them on medium-low to medium for longer to avoid hot spots.
Phase 2 & 3: The Active Window and Residual Heat Finish
Phases 2 and 3 are a coordinated dance. The active window is where you build momentum, and the residual finish is where you coast to perfection.
Identifying the Active Cook Window
This window begins the moment your food hits the properly preheated surface. Your job is to manage the heat to achieve your goal: a hard sear, a rolling boil, or tender vegetables. The key is to start planning your exit strategy about halfway through.
Executing the Residual Heat Finish
This is where you cook with leftover heat. The principle is simple: turn off the heat source early and let the stored thermal energy do the rest. Here’s how it looks in practice:
- Pasta & Grains: For pasta, turn off the heat 1-2 minutes before the package’s “al dente” time. Leave it in the hot water with the lid on—it will finish cooking perfectly. Do the same for rice; turn off the heat and let it steam, covered, for the last 5-10 minutes.
- Proteins & Veggies: When searing a steak or sautéing greens, turn the burner off about a minute before they’re done to your liking. The hot pan will carry them the rest of the way without risk of overcooking.
- Roasted Vegetables: Turn off the oven 5-7 minutes early and leave the tray inside with the door closed. The falling temperature gently finishes the cooking.
Do: Cover the pan or pot during the residual phase to trap heat. Don’t: Move the food around constantly; let the ambient heat work its magic.
Common Mistakes That Waste Energy (And How to Fix Them)
Even with the best intentions, old habits can undermine your new energy saving cooking routine. Here’s what to watch for.
Mistake: Preheating the oven for way too long.
Fix: Sync your preheat with your meal prep. If it takes you 15 minutes to chop and season vegetables, that’s when you start the oven—not when you begin thinking about dinner.
Mistake: Cranking every burner to “High.”
Fix: Recalibrate. Use “High” only for boiling water. For searing and frying, start with “Medium-High” and adjust down. You’ll use less energy and have more control.
Mistake: Forgetting about cast iron’s heat retention.
Fix: For foods that cook quickly (like eggs or delicate fish), move a preheated cast iron pan off the burner entirely 30 seconds before adding your fat or food. Let the pan’s massive thermal mass do the work without direct flame.
Mistake: Stirring constantly during the residual phase.
Fix: Once you turn off the heat, put the lid on and walk away for a minute. Constant stirring releases precious trapped heat and steam, defeating the purpose of using residual heat to cook.
Mastering the Heat Flow in Your Kitchen
Adopting this preheat and residual heat method requires a slight mental shift. You trade a bit of upfront attention and timing for significant rewards: lower energy bills, a cooler kitchen, and often, more consistently cooked food with better texture. The residual heat finish, in particular, is a gentle cook that’s hard to overcook with.
Don’t feel you need to overhaul every meal at once. Start by practicing the stovetop preheat guide with your next batch of sautéed vegetables, or try turning off the oven early for your next tray of roasted potatoes. Once you feel the control and see the results, this three-phase protocol will become your default, efficient way to cook.