Think of your kitchen not as a room, but as a workstation. In any efficient workshop, the tools are organized for the job at hand, not hidden away where finding them wastes precious energy before the real work even begins. A cluttered counter or a cabinet stuffed with appliances creates the same friction, turning the simple act of making dinner into a multi-step scavenger hunt. The goal here isn’t just tidiness—it’s about creating a system that makes cooking feel effortless. The best way to store small appliances for efficient cooking is to build a kitchen appliance storage workflow designed for speed. By strategically placing your tools based on how often you use them, you can dramatically reduce cooking setup time, minimize the frustrating dance of plugging and unplugging, and reclaim the joy of actually cooking.
Here’s how to store small appliances for fast access and less repeat heating: The best system combines strategic placement based on frequency of use with a simple ‘prep and park’ routine. Keep daily drivers like your toaster or coffee maker on a dedicated, accessible counter zone. Store weekly-use items like blenders or food processors in easy-access cabinets or on open shelves. For everything else, use labeled bins in a nearby pantry or cupboard. The key is to group appliances by task and minimize the steps between storage and plug.
Your Storage Toolkit: Zones, Risers, and Smart Containers
Think of your kitchen as a workshop. You wouldn’t keep your most-used screwdriver at the back of a cluttered drawer. The same logic applies to your appliances. The foundation of an efficient small appliance storage system is built on three physical concepts: zones, vertical space, and smart containment.
1. The Appliance Landing Zone
This is your prime countertop real estate. Dedicate a specific, accessible area—like a corner or a section against the wall—for the 1-3 appliances you use daily. Your coffee maker and toaster are classic candidates. Placing them on a simple tray or cutting board defines the zone and makes cleanup easier. This is non-negotiable for a fast access appliance setup; if you use it every day, it deserves a permanent, ready-to-go spot.
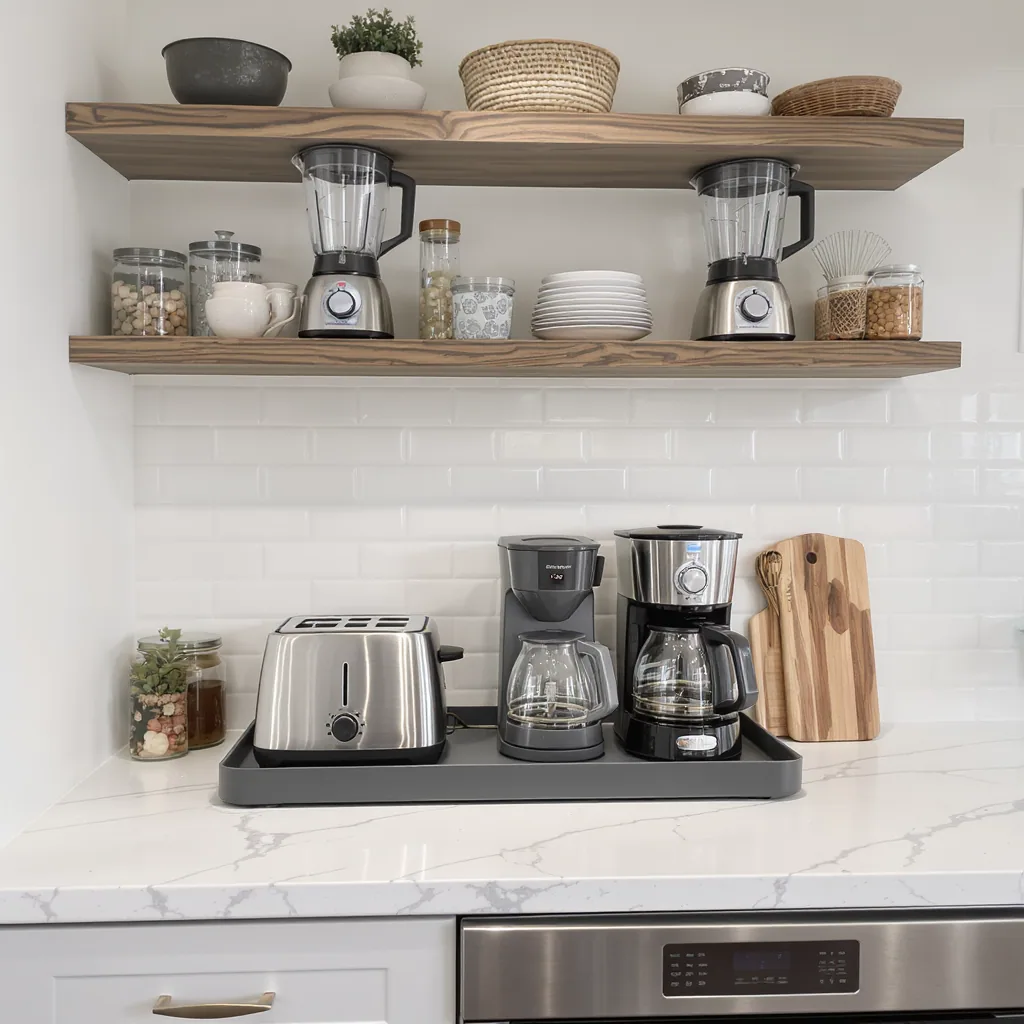
2. Vertical Storage (Risers & Shelves)
Out of sight often means out of mind—and out of reach. For appliances you use weekly, like a blender or food processor, get them off the deep cabinet floor. Use tiered shelf risers inside cabinets or on open shelves. This lets you see and grab the appliance you need without moving three others first. It’s a simple upgrade that dramatically improves your kitchen appliance storage workflow.
3. Smart Containers for Task-Based Groups
For monthly-use items (waffle iron, stand mixer attachments, specialty gadgets), use bins, baskets, or trays to create “kits.” Group everything for a specific task together. For example, a “Breakfast Station” bin could hold the waffle iron, its plates, and the measuring cup you always use with it. Label the bin clearly. When you need it, you pull one container, not five separate items. This is the secret to minimize kitchen setup steps. For product ideas that fit this system, sites like Apartment Therapy offer great visual inspiration.
The 5-Minute ‘Prep & Park’ Daily Routine
The best storage system in the world is useless without the habit to support it. Enter the “Prep & Park” routine. This isn’t about deep cleaning; it’s about the two-minute reset immediately after use.
Here’s how it works: As soon as you’re done with an appliance (say, your blender), you clean it, dry it, and then—critically—return it to its designated “ready” spot. You don’t leave it on the counter to deal with later, and you certainly don’t shove it into a random cupboard. You “park” it back in its home, plug loosely coiled, and ready for its next use. This single habit eliminates the frustrating “where did I put it?” search that adds minutes and mental friction to your next cooking session. By making this a non-negotiable step, you actively reduce cooking prep time for future-you.

Photo by Tima Miroshnichenko on Pexels
Scenario: Streamlining Your Weekly Meal Prep
Let’s apply these principles to a high-stakes, time-sensitive task: your weekly meal prep. This is where a good kitchen workflow organization pays the biggest dividends.
Instead of opening five different cabinets as you cook, you set up a “prep station” beforehand. On Sunday morning, you might pull your food processor onto the counter from its easy-access shelf. Next to it, you place a small container holding its S-blade and shredding disc (stored together in a bin). Your blender base sits on a riser in an open cabinet above, cord within reach. Your air fryer is in a labeled bin at the front of a lower cabinet. You’ve now gathered your tools with minimal steps. After prep, the “Prep & Park” routine kicks in: everything is cleaned and returned to its specific, logical home. Next week, the setup takes 60 seconds instead of 10 frustrating minutes of hunting.
What Most People Get Wrong (And How to Fix It)
Small missteps can completely undermine your system. Here are the most common pitfalls and how to correct them.
DON’T: Store appliances by size or shape, stacking the slow cooker on the rice cooker because they fit.
DO THIS INSTEAD: Store by frequency of use. The weekly rice cooker gets prime, easy-access real estate. The seasonal slow cooker can go higher or deeper, but in a labeled bin so it’s a single unit to retrieve.
DON’T: Put your daily-use toaster in a cabinet because you want a “clear counter.”
DO THIS INSTEAD: Embrace a dedicated “Landing Zone.” A clear counter is less valuable than organized countertop storage that saves you time and motion every single day.
DON’T: Let cords become a tangled mess shoved inside the appliance or cabinet.
DO THIS INSTEAD: Make cord management part of the “Park” step. Loosely coil the cord and use a simple Velcro strap or tuck it neatly. A neat cord makes setup faster and safer.
DON’T: Clean an appliance but leave it on the drying rack indefinitely.
DO THIS INSTEAD: The drying rack is a temporary stop. Once dry, immediately “Park” it. An appliance in its home is an appliance that’s ready to work, which is the ultimate goal of appliance storage for quick meals.
Your First Step to a Friction-Free Kitchen
The goal here isn’t perfection or a magazine-worthy kitchen. It’s creating a personal system that removes tiny, daily frustrations. You now have the toolkit and the routine. The only thing left is to start.
Your decisive next step? Tomorrow morning, before you make coffee or toast, pick the one appliance you use most. Give it a true, intentional “home” based on its frequency—either on your new Landing Zone or in an easy-access spot. Practice the “Prep & Park” with it just once. Efficiency is built one small, smart habit at a time. Start with that single victory, and the rest of your streamlined cooking workflow will naturally follow.